2012-06-27

SPVHD
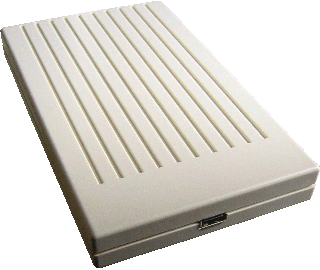
Smartport Virtual Hard Drive
An external USB solution for the Apple II
 1 Introduction
2 Preparing the usb device
3 Preparing disk images
4 Connecting to the Apple //c
5 Connecting to the Apple IIc+
6 Connecting to the Apple IIgs
7 Connecting to the Apple IIe
8 Connecting the USB device
9 Booting
0.Updating the firmware
A Donations
1.Introduction
The SmartportVHD is a device allowing Apple II computers to access disk images stored onto an USB storage, like USB keys, self powered USB hard disk, or any storage device using USB connexion (the device must be self powered or must draw less than 3 watts from the USB).
2.Preparing the usb device
The preparation of the USB storage media require a computer supporting FAT filesystem. The USB storage media must be formated with either FAT16, or FAT32 filesystem. FAT16 could be more convenient with older Macintosh and PC, FAT32 is more convenient for modern computer.At the root of the USB storage media, create a directory named "spvhd". The content of this directory will be parsed by the SmartportVHD during the boot, looking for disk images.
3.Preparing disk images
Disk images must be Prodos ordered except for Dos which require Dos ordered disk images. You can use CiderPress to create and manage them, ADT to create them from existing Apple II disk, or download them from internet.Copy your disk images into the "spvhd" directory of the storage media, and rename them drive0.img, drive1.img, and so on up to drive9.img. The SmartportVHD is able to show up to ten disk images at the same time to the Apple II. Your can store more disk images to have all your disk images at the same place, and rename them at the time you need them.
4.Connecting the SmartportVHD to the Apple //c
Switch off the Apple //c, then connect the SmartportVHD to the external floppy drive connector of the Apple //c.
You can connect additionnal Unidisk 3.5 or 5.25 drive to the daisy chain connector of the SmartportVHD.At power up, the Apple //c will try to boot from internal 5.25 floppy drive, and if no floppy are present from the first smartport device connected.
Note 1: 5.25 drives must alway be at the end of the chain.
Note 2: SmartportVHD and Unidisk 3.5 can be interchanged within the chain depending of the order you want the Apple II to see the drives.
Connexion of the SmartportVHD on the rear of the Apple //c:

5.Connecting the SmartportVHD to the Apple IIc+
Switch off the Apple IIc+, then connect Apple 3.5 drives if present to the external floppy drive connector of the Apple IIc+.
Connect the SmartportVHD to the daisy chain connector of the Apple 3.5 drives if present, otherwise to the external floppy drive connector of the Apple IIc+.
You can connect additionnal Unidisk 3.5 or 5.25 drive to the daisy chain connector of the SmartportVHD.At power up, the Apple IIc+ will try to boot from the internal 3.5 floppy drive, and if no floppy are present from the first device connected to the external floppy port.
The Apple IIc+ have a strange behaviour if you want to use more than four drives, physical or virtual: the internal floppy drive is mapped to slot 5 drive 1, but also to slot 1 drive 1, wich is the mapping normaly used for the 5th device. This mapping is taking one entry in the mapping loop, and the total number of devices is kept, so the last device in the chain is never mapped. Adding a 6th device, the 5th become mapped in S1D2, and so on.
Note 1: 5.25 drives must always be at the end of the chain.
Note 2: SmartportVHD and Unidisk 3.5 can be interchanged within the chain depending of the order you want the Apple II to see the drives.
Note 3: Apple 3.5 drives must always be at the start of the chain.
Connexion of the SmartportVHD on the rear of the Apple IIc+:

6.Connecting the SmartportVHD to the Apple IIgs
Switch off the Apple IIgs, then connect Apple 3.5 drives if present to the external floppy drive connector of the Apple IIgs.
Connect the SmartportVHD to the daisy chain connector of the Apple 3.5 drives if present, otherwise to the external floppy drive connector of the Apple IIc+.
You can connect additionnal Unidisk 3.5 or 5.25 drive to the daisy chain connector of the SmartportVHD.At power up, the Apple IIgs will start from the boot device specified in the Apple IIgs toolbox. Usually, it will try to boot from an internal device, then from an external 5.25 floppy drive, then from a 3.5 floppy drive or smartport device.
Note 1: 5.25 drives must always be at the end of the chain.
Note 2: SmartportVHD and Unidisk 3.5 can be interchanged within the chain depending of the order you want the Apple II to see the drives.
Note 3: Apple 3.5 drives must always be at the start of the chain.
Note 4: to boot from the SmartportVHD with Apple 3.5 drive present, you must use the smartboot system disk from Zonker Programming.
Connexion of the SmartportVHD on the rear of the Apple IIgs:

7.Connecting the SmartportVHD to the Apple IIe
The Apple IIe require the Liron card to use the SmartportVHD.
Switch off the Apple IIe, then connect the SmartportVHD to the Liron card connector.
You can connect additionnal Unidisk 3.5 or 5.25 drive to the daisy chain connector of the SmartportVHD.At power up, the Apple IIe will try to boot from the card in slot 6, usualy a 5.25 floppy drive controller. Then it will try the slot 5, usually the place for the Liron card controling smartport device like the Unidisk 3.5 and the SmartportVHD.
Note 1: 5.25 drives must always be at the end of the chain.
Note 2: SmartportVHD and Unidisk 3.5 can be interchanged within the chain depending of the order you want the Apple II to see the drives.
Connexion of the SmartportVHD on the rear of the Apple IIe:

8.Connecting the USB device
This is the easiest operation: simply insert your USB device connector into the front USB receptacle connector of the SmartportVHD. During insertion, hold the spvhd by the top and rear like on photo 8a. During removal, hold the spvhd on the top and front like on photo 8b. It's preferable to insert and remove USB device when the SmartportVHD is powered off, to avoid any filesystem corruption. Take care that your USB device musn't drawn more than 3 watts from the SmartportVHD to prevent any damage to both devices and the Apple II. If your USB device require more power, it must be self powered.
Photo 8a: USB key insertion Photo 8b: USB key removal


9.Booting
At boot, the Apple II will establish a communication with the SmartportVHD.
At this point, the SmartportVHD will hold on the Apple II in order to establish the communication with the USB device.
During all this time, the Apple II display stay frozen and the green led of the SmartportVHD is blinking.
Frozen screen during USB setup:

A usefull utility from Zonker programming, named smartboot, allow you to boot from any smartport device in the chain. I prepared two floppy images you can download here for a 3.5 floppy, or here for a 5.25 floppy. Once you have the image written to a floppy, look at the readme file (the Prodos file is already the smartboot software, you just need to run sb.config).
0.Updating the firmware
The SmartportVHD was designed with upgradability in mind, so you can replace the firmware inside the SmartportVHD by a new one, either to add new features or bug fixes. As the project is open source, you can also get the source code of the firmware and made your own customization and share it whith other SmartportVHD owners.
The requirements are the following:
- a modern computer running under MacOS X, Linux, or Windows
- an USB A male to USB A male cable, available most of the time from ebay
USB A male-male used to update the firmware:

- under MacOS X: install dfu-programmer
- under Linux: install dfu-programmer for your Linux distribution
- under Windows: install Atmel's FLIP
- the lastest firmware package available from here
- Unzip the firmware package you downloaded
- Unconnect the SmartportVHD from any Apple II computer and from any devices
- Connect the USB cable to your modern computer and then to the front USB connector of the SmartportVHD. The SmartportVHD is now powered by USB, don't connect anything on it as it could damage the hardware
- Look at the underside of the SmartportVHD, there is two small holes letting you access buttons named Reset and Update. If you own a kit, the buttons are located directly on the board and are labeled Reset and HWB.


- Press and stay pressed on the Reset button, then press and stay pressed on the Update button, then depress the Rest button, then depress the Update button. The SmartportVHD is now waiting for a new firmware
- Launch the "upgrade.sh" or "upgrade.cmd" script from the unpacked firmware package. Within the minute, a message saying "reset at90usb..." mark the end of the upgrade. If a message like "device not found" is returned, then start back from the previous step.
- Unconnect the USB cable, the SmartportVHD is ready to serve the Apple II
A.Licenses
SmartPortVHD:
- Firmware and enclosure developements by Cédric Peltier
- http://www.spvhd.org
- License : GPL v3 license & Creative Commons 3.0
- Designed by Opendous inc
- http://code.google.com/p/micropendous
- License : Creative Commons 3.0
- Written by Dean Camera
- http://www.fourwalledcubicle.com/LUFA.php
- License : MIT licence
- Copyright (C) 2010, ChaN, all rights reserved
- http://elm-chan.org/fsw/ff/00index_e.html
- License : BSD style
0.Donations
If you would like to make a donation to support my work, I will be glad to receive the amount of your choice via paypal: